Contents:
- Why Clippers Dull and What Happens to Dull Blades
- Understanding Your Clipper Blade Type
- DIY Sharpening: The Honing Stone Method
- Reader Story: Saving Money Through DIY Maintenance
- Expert Tip: Creating a Sharp Edge from Worn Blades
- Professional Sharpening Services: When to Use Them
- Cost Breakdown: DIY vs. Professional Sharpening
- Small Spaces and Apartment-Friendly Sharpening
- Common Mistakes to Avoid
- FAQ
- How often should I sharpen my clippers?
- Can I use a standard kitchen knife sharpener for clippers?
- What grit stone is best for clipper sharpening?
- Is professional sharpening better than DIY sharpening?
- Can I sharpen clipper blades without disassembling the clippers?
A common myth circulates through barbershops and hair salons: sharpening hair clipper blades at home is impossible or dangerous. This misconception costs people money—professional clipper sharpening in the UK costs £15-40 per pair, and many people replace perfectly good clippers annually simply to avoid sharpening.
The reality: sharpening clipper blades is straightforward, requiring minimal equipment and less than 30 minutes of work. Learning this skill saves hundreds of pounds yearly and extends clipper lifespan significantly. Most clippers can be professionally sharpened 5-10 times before replacement becomes necessary.
Why Clippers Dull and What Happens to Dull Blades
Clipper blades dull through use because hair, despite feeling soft, contains minerals and microscopic rough patches that gradually wear the blade’s cutting edge. Daily use dulls blades noticeably within 3-6 months. Cutting coarse or textured hair accelerates dulling compared to fine hair.
Dull clippers produce several problems: they pull hair rather than cut it cleanly, causing discomfort and skin irritation; they generate excessive heat from friction, which can burn skin; they require increased pressure to cut, causing hand fatigue and RSI risk; and they produce uneven cuts with visible missing patches. Continuing to use severely dull clippers damages hair by creating split ends along the cut line rather than clean edges.
Understanding Your Clipper Blade Type
Before sharpening, identify your clipper blade type. Most modern clippers use one of three designs.
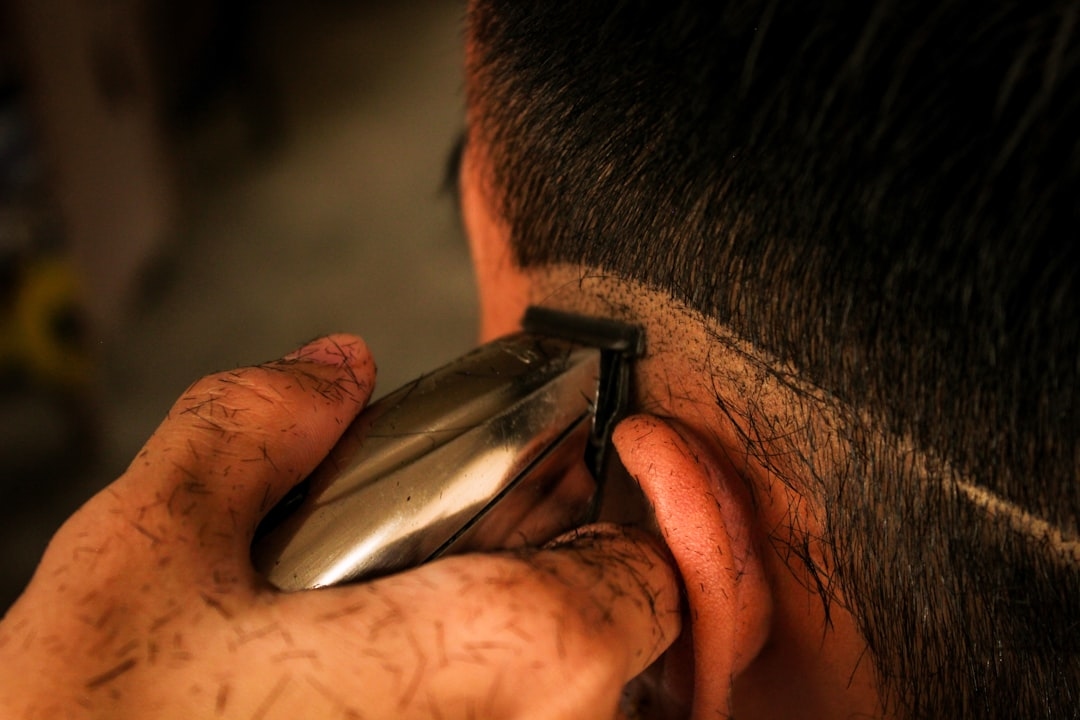
Two-blade clippers contain a stationary bottom blade and a moving top blade that slides back and forth. Both blades require sharpening. These dominate the UK professional market.
Rotary clippers use a rotating circular blade system. These require specialised sharpening and aren’t suitable for DIY methods—send rotary clippers to professional services.
Magnetic clippers contain electromagnets driving the blade motion. Most magnetic clippers are user-serviceable but not DIY-sharpenable due to internal complexity.
For this guide, focus on two-blade clippers, which represent 80% of personal and professional equipment.
DIY Sharpening: The Honing Stone Method
Professional-grade honing stones work beautifully for clipper blade sharpening and cost £10-20 from Whetstone Direct or Amazon UK. Choose a 4000-6000 grit stone—this range maintains edge sharpness without requiring extreme precision.
Process: First, completely disassemble your clippers. Remove the top blade by loosening the screw holding it in place (usually one screw). Set the bottom blade aside as well. Most clipper manufacturers provide illustrated disassembly instructions in the manual; if yours didn’t, search “[clipper model] disassembly” online for YouTube guides.
Soak your honing stone in water for 5-10 minutes before sharpening. This prevents the stone from absorbing moisture from the blade and affecting results. Place the stone on a flat surface with a towel underneath to catch water.
Hold the top blade at a 15-20-degree angle to the stone, matching the existing bevel angle (the angled edge visible on the blade). Using gentle pressure, draw the blade across the stone away from your body in a smooth motion—never push the blade directly down into the stone. Complete 10-15 passes on one side, then flip the blade and repeat on the other side. Alternate sides, completing 3-4 cycles total.
The bottom blade requires identical treatment. After sharpening both sides of both blades, wash thoroughly under running water to remove stone particles that would damage clipper mechanisms. Allow to air-dry completely before reassembly.
Reader Story: Saving Money Through DIY Maintenance
Sarah, a hairdresser in Manchester, had been sending her clippers for professional sharpening quarterly at £30 per pair. Over five years, she spent approximately £600 sharpening a £90 pair of clippers. After learning DIY sharpening, she purchased a honing stone for £15 and now maintains her own blades monthly in 20 minutes. Her clippers continue performing excellently at year seven, and she’s spent only £15 on sharpening supplies. This simple skill transformed her clipper economics entirely.
Expert Tip: Creating a Sharp Edge from Worn Blades
Professional stylists understand the difference between honing (maintaining sharpness) and stropping (polishing edges). Stropping is the missing step most DIY attempts skip. After honing your stone, use a leather strop (approximately £8-15) to refine the blade edge. Stropping removes microscopic debris left by the stone and realigns the blade’s molecular structure, restoring razor-sharpness.
Process: Hold the blade flat against the leather strop at 90 degrees to its length. Draw the blade spine-first away from you along the leather. Flip and repeat on the other side. Complete 10-15 passes per side. This single step transforms adequately sharp blades into genuinely sharp blades.
Professional Sharpening Services: When to Use Them
Some clipper types resist home sharpening. Rotary clippers, magnetic clippers, and spring-driven clippers benefit from professional service where specialists have equipment to maintain precise blade alignment. UK professional services charge £15-40 per pair and typically return clippers within 5-7 working days.
Send clippers for professional sharpening if they’ve been dropped or physically damaged, if you’re uncomfortable with DIY methods, or if blades have become severely dull requiring complete restoration rather than maintenance. Professional services have industrial-grade equipment restoring extremely dull blades more effectively than home honing stones.
Cost Breakdown: DIY vs. Professional Sharpening
Initial equipment investment for DIY sharpening:
- Honing stone (4000-6000 grit): £10-20
- Leather strop: £8-15
- Total initial investment: £18-35
This investment pays for itself after one professional sharpening session (£15-40). Over five years of regular clipper use with monthly DIY maintenance, you’ll spend £20-35 total on maintenance versus £180-240 on professional sharpening (assuming quarterly service at £30 per pair).
Small Spaces and Apartment-Friendly Sharpening
DIY clipper sharpening works wonderfully for apartment residents because it requires minimal space and produces no noise. Unlike many home maintenance projects, sharpening your clippers takes place entirely on a small bathroom counter with a towel and honing stone. No power tools, no workshop required.
Common Mistakes to Avoid
Never sharpen your blades at angles steeper than 20 degrees—this reduces blade longevity and creates a dull edge paradoxically. Never use excessive pressure—let the stone do the work. Gentle, consistent pressure produces better results than aggressive scrubbing.
Don’t skip the stropping step. Honing alone leaves blades adequately sharp but not genuinely sharp. The strop refines what the stone created.
Never reassemble your clippers with wet blades. Water left on the blades causes rust and internal moisture damage. Always allow 15+ minutes air-drying after washing post-sharpening.
FAQ
How often should I sharpen my clippers?
Professional-use clippers (cutting 8+ hours daily) benefit from monthly sharpening. Personal-use clippers (weekly use) need sharpening every 2-3 months. When clippers start pulling hair or require excessive pressure, it’s time to sharpen regardless of schedule.
Can I use a standard kitchen knife sharpener for clippers?
No. Kitchen sharpeners use different grit ratings and angles designed for knife geometry, not clipper blade geometry. Using the wrong sharpener damages clipper blades. Invest in a proper honing stone designed for tool sharpening.
What grit stone is best for clipper sharpening?
A 4000-6000 grit stone balances cutting edge sharpness with blade longevity. Finer stones (8000+) create extremely sharp edges but wear blades faster. Coarser stones (2000-3000) remove material quickly but leave edges less refined.
Is professional sharpening better than DIY sharpening?
Professional sharpening uses industrial equipment producing slightly sharper edges than DIY methods. However, properly executed DIY sharpening produces results 90-95% as good as professional service at a fraction of the cost. For regular maintenance, DIY works excellently.
Can I sharpen clipper blades without disassembling the clippers?
No. Sharpening requires access to individual blades at proper angles. Attempting to sharpen assembled clippers risks damaging the clipper mechanism. Always disassemble following manufacturer instructions.
Sharpening your own clippers transforms them from frustrating, pulling-hair tools back into genuinely useful equipment. The skill requires minimal equipment, takes less than an hour to learn, and saves hundreds of pounds over five years. Most importantly, you’ll never again suffer the frustration of dull clippers pulling hair during a cut. Whether you use clippers professionally or personally, learning to sharpen is a practical skill that delivers immediate, tangible rewards.